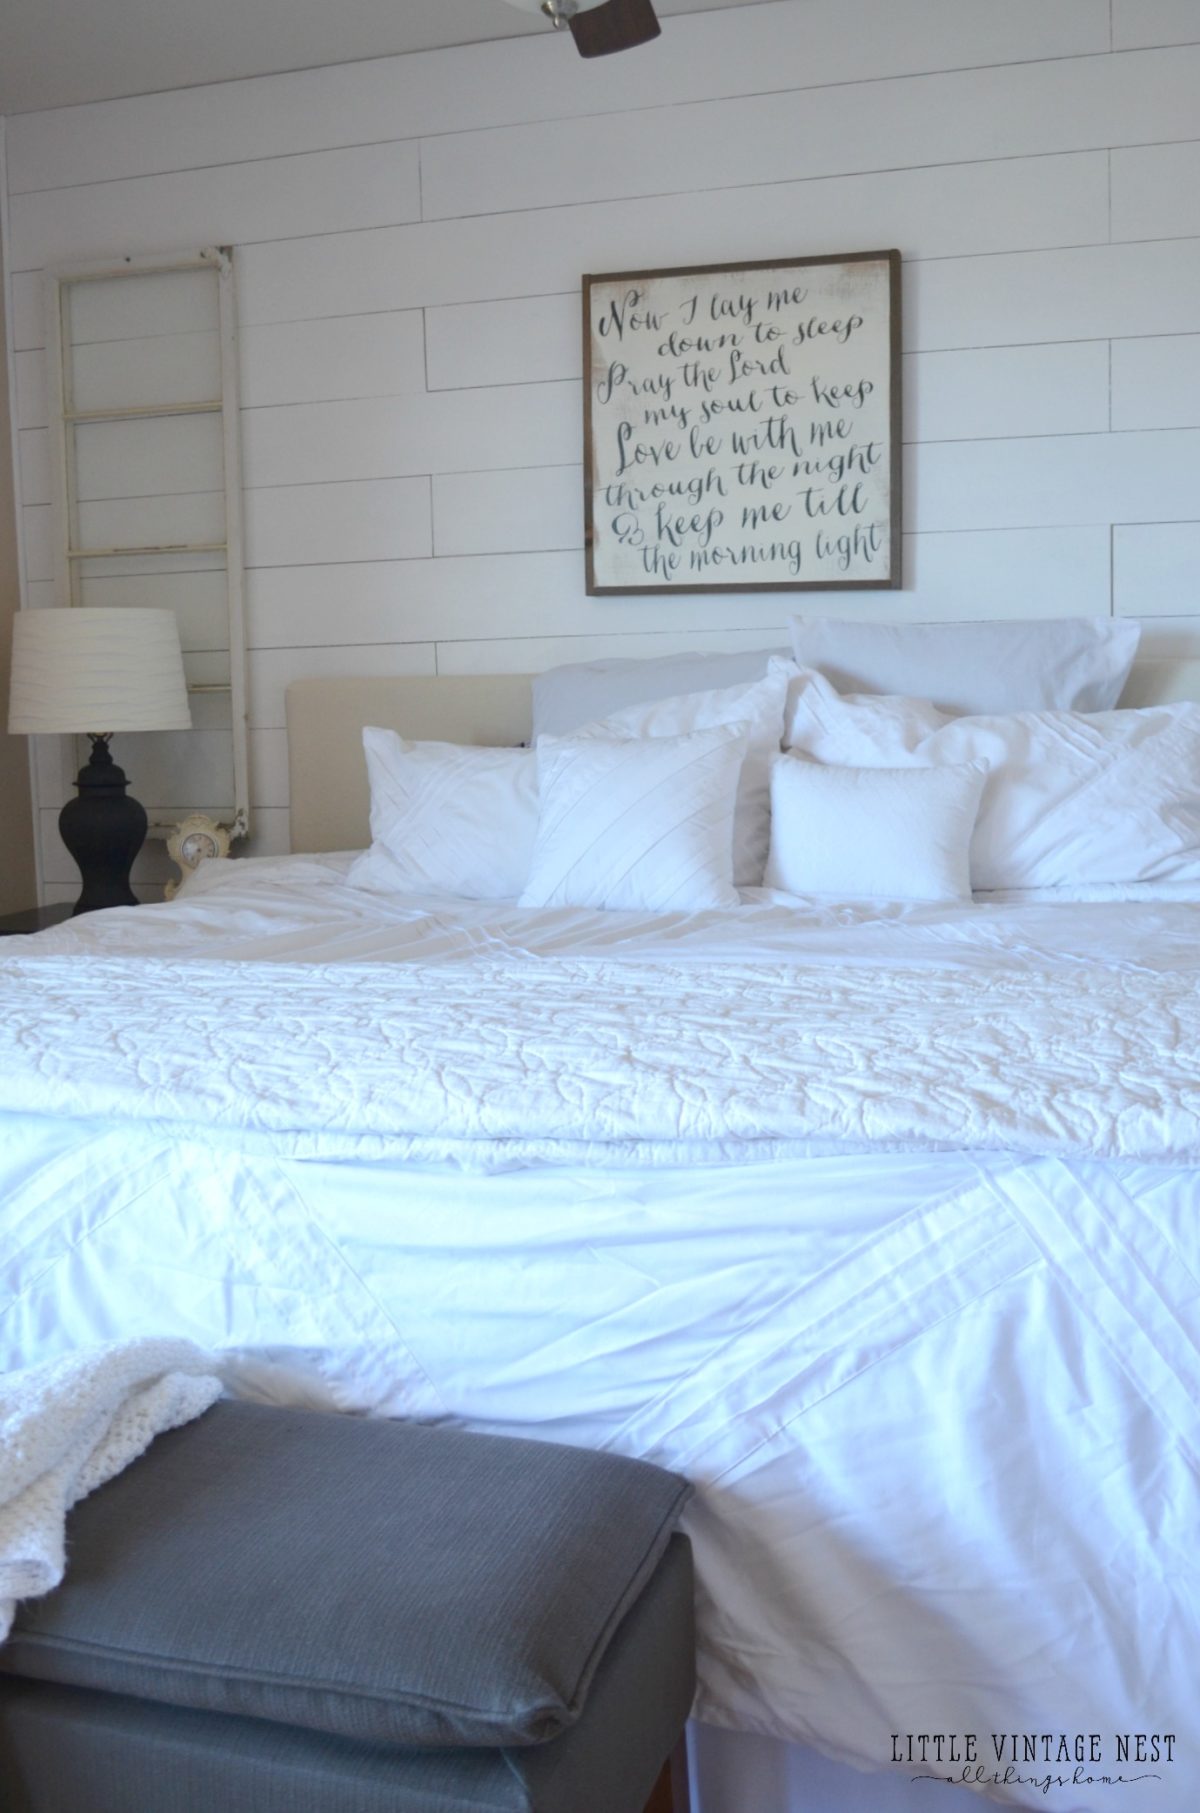
I’m back with another planked wall! I know what you’re thinking. And yes, you’d probably be right to say I’ve become obsessed with planked walls. But they’re just so easy and pretty. I can’t stop. So today I am sharing the planked wall I recently did in our master bedroom. This one was simple and quick, I love the way it turned out. For this project I did the the same technique I used in the breakfast nook planked wall post, so be sure to check that out for a little more detail.

Supplies needed:
- skill saw or chop saw to cut the boards to length
- jig saw to cut around outlets
- 4×8 sheets of underlayment (this wall took two full sheets)
- nail gun
- level
- hammer
- two nickels (to evenly separate your planks as you go)
- stud finder (you’ll want to mark the wall so you know exactly where to shoot the nails if you’re lazy and don’t use liquid nails like me!)

I used 4×8 sheets of underlayment from Home Depot and I had them cut into 7″ planks by a nice fellow at the store. I’ve been told before they won’t cut the sheets in planks less than 6″ wide, so I went with 7″ just to be safe. I didn’t want to be turned away!
I started by finding all the studs in the wall and drawing a line down the wall so I could shoot the nails directly into all the studs. This will help the planks stay in place for the long haul. I started at the top of the wall, made sure the first plank was level, and worked my way down.

I recommend using a nickel to space your boards. This keeps things nice and even.

This went up super fast and I just alternated the boards to get a bit of a pattern going. After I had the wall finished I went in and filled the nail holes, then sanded them down nice and smooth.

Here’s the finished wall ready for paint.

For paint I used the Behr Pure White in Eggshell. It took 3 coats to get completely even coverage, which honestly was the most time consuming part of the whole project. But I love the finished look!

I plan to add some texture to the front of the windows, maybe a wreath or some cotton, but for now this will do. More old windows for the win!


Thanks so much for stopping by!

Love it????
You’re inspiring me to do our master wall, too. It’s been on my list. Great job!
Go for it Jaimee! Thanks for stopping by.
That’s amazing and it sounds so easy!!! Great tutorial!
Thanks so much Jessica! This is definitely DIY friendly.
you are inspiring me too! love it!!
We absolutely love this. How long did it take you?
Thank you Nanci! It took me a few hours to get the planks up–that part was easy. It honestly took me longer to paint, I had to do 3 coats.
very nice post, i certainly love this website, keep on it
Thanks for the tutorial! I was looking for someone who had done this specific pattern. It looks so good I am motivated to do it now! Nice job 🙂
wow, awesome post. Really Great.
Looking forward to reading more. Great blog.Much thanks again. Awesome.
A big thank you for your article.Really thank you!
Looks amazing!! How did you deal with wall plugs? That’s where I’m not sure I’d know how to cut them out – especially if they landed in the middle of the plank.
You can just cut the board to fit around the outlet. Use something small like a jigsaw. That’s what we do and it works great!
I love the planked walls. I grew up with these typed walls throughout our home. I plan to put this in our bedroom s, son’s bathroom and basement. However, I know this will take time/$$$$$$$$$. You bedroom is fabulous, I love it!
I sooo want to do this to our MBR bed wall, because I want to completely cover an oddly placed window…dern those builder windows..what were they thinking? This would actually be cheaper than my initial idea (and the one the owner’s had when we viewed the house, which was covering the whole wall in curtains). Feeling more emboldened! Bless you!
I’m a little late to this party, but I am in love with your blog! You are soooooo gifted. Question… Is this Merino Wool on your bedroom walls?
Your bar is already looking good; it will be amazing, I’m sure! I have been wanting to put faux shiplap on the wall behind my bed (which has a corrugated tin headboard!). I have a long window on each side of the queen bed that nearly meets the adjoining walls. I picture doing the shiplap floor to ceiling, but only to the edge of the windows, with ONE board above each to hold hooks for the curtains. I know this isn’t “done,” but what do you think? I LIKE being different than “everybody else.”
I totally think that could work Vicky! I say go for it. Faux shiplap is awesome because it’s not permanent, so you could easily change it out if you don’t love it.