Goooooooood morning and happy Monday! It’s an exciting day around here because today I get to show you the magical powers of beadboard. Yep, today I get to share the exact way we did beadboard backsplash in our kitchen. Whoot whoot! Now as you probably know, we recently finished our kitchen remodel, which I shared in this post last week. Well our funky backsplash was one of the biggest obstacles we had to overcome in that renovation. It was a multi-colored block design fully equipped with lots of orange and dark brown. I wasn’t loving it by any means, so it definitely needed to go. We talked about a TON of different ways to replace it without spending a fortune (we even thought about painting it!) but ultimately we decided that covering the tile with beadboard was the way to go. I haven’t seen any tutorials for this kind of thing, so I wasn’t sure how it would work. But I’m happy to say it went perfectly and the results are pretty darn awesome. And I think you’ll be surprised to see that it was actually a simple process. All righty, let’s get started. Here’s how the kitchen looked when we began:


This tile backsplash didn’t jive with my style, obviously. I really tried to love it for two years, but it just wasn’t happening. I was actually hoping that I’d change my mind once we had the new quartz countertops installed, but I disliked it even more with the new tops. That tile definitely needed to go!

1. Before doing anything the first step was cleaning the tile. I just used hot soapy water to get the job done. Next up we took off the outlet covers.
2. We started by measuring the backsplash so we knew exactly how much space we needed to cover. Then we bought several 4ft sheets of beadboard from Home Depot. They’re only $10 a sheet, so the whole project was super affordable.
3. Next we cut all of the beadboard to size using a table saw. We started in the far corner of the kitchen, measuring each piece as we went and making sure to do cutouts for all the outlets or any other spots we needed to work around, like the window above the sink.
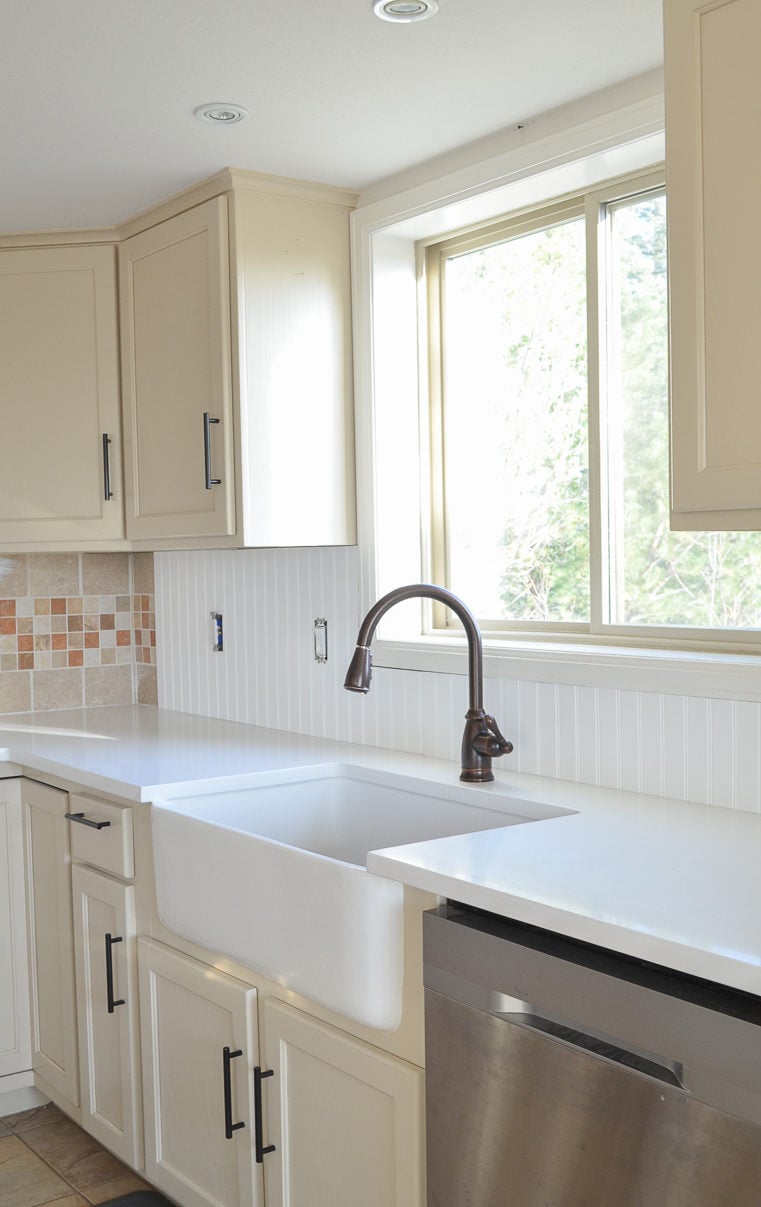
4. Our strategy was to get all of the pieces cut to size before adhering them to the tile. Once we had one piece cut we’d lay it up against the tile (like the photo below) and then move onto cutting the next piece.


5. Once we had all of the boards cut we decided it would be easiest to paint them first before adhering them to the tile. I’m SO happy we did it this way because it really saved us a lot of time. And painting them in our dining room was MUCH easier than painting them squished under the cabinets. We used Behr Ultra Pure White in satin finish.

6. Next up it was time to adhere the beadboard to the tile! We used heavy duty construction adhesive for this part. This stuff works with tile and masonry, plus it dries really fast, so that’s what we went with and it worked really well.

7.We put a generous amount on the back of each piece and then firmly placed each one on the tile!

The key with this part was to make sure to firmly press each piece against the tile and hold it for about 30 seconds or so. This is definitely a two person job because you need to be certain that each piece is securely in place and lined up evenly before moving on to the next one.


Piece by piece we worked our way around the kitchen.This part took maybe 20 minutes at most. Easy peasy.
8. Once we had all of the pieces on we simply put the outlet covers back in place (you can use these extenders if you need some extra length) then the final step was going around the top and bottom of the beadboard with acrylic latex caulk plus silicone to seal everything. Make sure whatever caulk you are using has silicone it in, since it will be exposed to water.

And that’s it! All done.


One more shot of the before and after:

I really can’t believe how well this worked and how it transformed out kitchen. I absolutely love it. Overall it cost us about $200 by the time we bought everything and got it done. And honestly, I’m so glad we did this instead of ripping out the old tile and replacing it with something new. Not only did it save us a TON of money and time, but I really love the warmth and texture that the beadboard gives. It’s a nice combination with the sleek quartz countertops and it gives the whole kitchen a very cottage-y vibe.
We’ve been living with this now for about two weeks and in that time it’s been easy to clean and there have been no issues whatsoever. And I honestly don’t anticipate having any problems. We sealed it with a heavy duty silicone caulking, so there should be no issues with water getting under the wood. I thought about sealing it further with a clear polycrylic, but I know sometimes that can cause white paint to yellow over time so I hesitate to do that. I really think this will hold up well and I do plan to post updates on how it’s doing every six months or so.
Thanks so much for dropping by the blog today. I hope you all have a fabulous week ahead. Be sure to let me know if you have any questions about your beadboard backsplash!
KITCHEN SOURCES (click the lower right side of any image below for more info):

Other posts you might want to check out:
Farmhouse Style Kitchen Makeover Reveal
Farmhouse Master Bathroom Reveal
Transitioning to Farmhouse Style: Complete Shopping Guide
PIN FOR LATER


Looks great! I will be keeping this idea in mind for our kitchen update.
My cupboard doors are getting painted this month!!
Oh that’s exciting Dianne!!
Wow I love your kitchen just beautiful
The beadboard looks fantastic !! Thank You for sharing the “how to”.
🍂Linda
Thanks for dropping by Linda!
It looks great! Its wonderful how easy it was! On a side note I have to say I have had Jar envy every time I see that Glass jar of flowers!!! At a vintage yard sale this past weekend I found the exact jar!!! I am so excited! Thanks for the inspiration! Your home is beautiful!!!
Oh yay!! So glad you found a jar like that Kristen. I have several of them now and they’re all I use to hold my fresh flowers.
Thank you so much for this post. This is something we had planned on doing this winter. My only concern is how water will effect the piece behind the sink? It seems we always get a lot of splash back there. We also will be putting it behind our stove. Again wondering how that will be to maintain.
I always enjoy your posts.
Thanks!
I have had a bead board backsplash all around my bathroom half way up with chair rail and continued it behind the sink counter as well. I painted jt with a white gloss paint. After several years, the water has damaged it where the bead board meets the countertop and it looks bad. I’d put something else in the area behind the sink.
Just love all that you did to change up your sweet kitchen…the sink with the great looking faucet and the beadboard give this a warm farmhouse feel, Sarah! Thanks for helping us out with how to do this and it didn’t cost a lot of money either (that’s great too!)
looks wonderful.
I loooove that look. Always have loved me some beadboard! 😆 It looks open clean bright yet cozy. Great job you two!
I have used beadboard in many places throughout our home now and I love it!
Beautiful!
We just did this last year and I love it. So clean and simple.
Oh you did?! That’s awesome, how is it holding up?
I love the way it looks now. So bright and inviting. Just clean and crisp. It does look really beautiful.
Thank you Corinne, it really made such a big difference!
It looks fabulous. What a great idea.
Thanks Marty!
We did this two years ago and I can report that it’s held up beautifully! No issues behind the sink and it cleans up well. It’s not only cheap and easy, but it’s warm and gorgeous! You’ll be happy with it for years!! I love how you’ve styled it!!
Wow that’s so good to hear it’s held up well for you!! Did you put it directly over the tile?
I absolutely love how your new backsplash turned out! I’m hoping to convince my husband to let me do this in our kitchen. Any tips for accurately marking and cutting the outlets?
Well my husband did all of that, but I think he drew little sketches of each piece to get the measurements just right.
I read in a You Tube tutorial that to get the outlet cutouts just right, put toothpaste on the 4 edges of the wall space then press the bead board against the toothpaste. The toothpaste will come off onto the back of the beadboard in the shape of the hole you need to cut!
Looks fab Sara…. love the worktops with the board, definitely a good choice to be rid of the tiles! As a side note… I did use a sealer on my white painted kitchen doors and in some places (where it was a little to thickly applied) there is yellowing…wouldn’t do that again! Your kitchen, like your entire home, looks fab!x
Oh that’s good to know Helen. It’s weird how things like that can yellow over time. Thanks for sharing!
Looks fab Sara…. love the worktops with the board, definitely a good choice to be rid of the tiles! As a side note… I did use a sealer on my white painted kitchen doors and in some places (where it was a little to thickly applied) there is yellowing…wouldn’t do that again! Your kitchen, like your entire home, looks fab!x
It’s beautiful!!! What a great idea! We need to replace our backsplash too so we may end up doing this now that I see how gorgeous this is!
Go for it Lindsay! I promise you will LOVE it!
This looks so beautiful! What a great idea! It totally transformed the kitchen!
Thanks so much Amber, I really love how it turned out!
Sarah!!! This looks wonderful! Absolutely professionally done!
Love it!
Thank you so much Jenifer! I really appreciate that. xo
We also used bead board on our backsplash walls, not over tile, just drywall. I did use exterior grade white paint, believing exterior paint stands up to rain/water better the interior paint will. So far so good, I’m happy with results too…so cute and I love it….brilliant that you went over tile…did you have any glue expansion with that adhesive? I used Gorilla Glue once and it blew up while drying and I had to cut those pieces off…a little went a long way. Just wondering if this tube of adhesive dried flat, it’s good to know! Darling kitchen….looks great!
It did dry pretty flat and we were careful not to use too much, even though that seems like it would be a good idea. You’re right, a little goes a long way! That was good thinking to use the exterior paint on yours. I’m hoping ours holds up well, I really don’t see why it wouldn’t!
I absolutely love this update! I would love to cover my ugly tile backsplash. I do have a question. How would you finish the edge of the bead board where my counter ends?
Susan
You can just use a tiny piece of molding. We only had one edge like that, but we are actually are in the process of wrapping the beadboard around the door (the one that leads into our dining room from the kitchen) and connecting the beadboard to the other side of the kitchen. That way it flows from one side to the next. But if we didn’t have that we would have just used a little piece of molding!
Looks amazing…I too was concerned about water getting behind the sink and sealing but other people reported no problems so Kudos to you and hubby for doing an awesome job!!!
I think we’ll be ok! And with the farmhouse sink there is actually several extra inches in the space between the faucet and the wall behind the sink, so there really isn’t that much water that even splashes up there.
Honestly, I didn’t think the tile looked too bad, but after you did the beadboard, it looks amazing! Good choice and it seems really easy to do.
You’re right, the tile didn’t look that bad, it just didn’t flow with the look I wanted to create. But thankfully it was easy to cover up! 🙂 Thanks so much for dropping by Lelanie!
Love it! We used this beadboard for our bathroom, and the only problem I had was that the finish started cracking around the sink. Hopefully since you painted yours first it will seal it up and you won’t have that problem! Awesome job, definitely keeping this idea in the back of my head for when we finally get to our kitchen reno!
It looks so much better now! I’m impressed! Amazing how easy it was too, I’ll consider the idea for my own kitchen update!
Found your blog a few months ago and have been coming regularly to look for style inspirations. We are in the process of updating the place we just bought, hoping to move in by end of the year. There are beautiful oak cabinets in the kitchen, in really good shape. Need a backsplash. How do you think the beadboard would look next to the cabinets? We will need counter tops, too and I’m at a loss for what color would look “most” like farmhouse feel, that will complement the cabinets. Any insights? Everything I see farmhouse-like has painted cabinets. I guess we could, but is there somewhere you could point me to that shows unpainted cabinets in a farmhouse kind of style? I think we’re up for the task of painting them…but they are in really great condition as they are. Love your blog and style. Keep it up! 🙂 Thanks
Hi Kim! Are your cabinets a dark oak or more of a blonde oak? I think the beadboard could definitely work and you could actually consider painting it a different color, like a soft gray or cream color. You wouldn’t have to do white. I haven’t painted kitchen cabinets yet, but I hear it’s a lot of work. Totally worth it in the end, but a big job for sure!
Beautiful! My husband and I did this 2 years ago as removing the old tile was impossible without destroying the wall! It was so cost effective ..about 30$as my kitchen is small! Love it !!
Beadboard looks great! We ordered beadboard from PVC type material. It is pricey but no worries about damage! Oh and it is white and also paintable!
Your Kitchen looks fabulous, I’m in the process of doing similar to my back splash. I can’t wait to see what else you’re going to do.
This looks amazing & is exactly what I’m wanting to do to cover a laminate backsplash I don’t love.
My only concern is how it will hold up… I was wondering if you could let me know without the polycrilic… I’d really prefer not to seal since I’m also concerned about yellowing. Any update, info or advice you can give is SOOOO appreciated! Your instructions & links are by far the easiest I’ve seen!!! Thank you!!!
Hi there Melanie! So far ours is holding up beautifully. And to be honest, it’ better than I expected. So far everything is great, even around the sink!
Thank you so much for your response!! If I can get someone to help me with doing the cuts, I’m going to do this in my kitchen. Your instructions/project inspired me & are so helpful. Thanks so much!!!
Now that it’s been a couple years, how has this held up?! This is an awesome idea!!
Still holing up really well!! No issues at all. I need to do an update on it!
This look wonderful. Thank you for sharing!
Did you also update your old cabinet? I would love to use this idea for my small kitchen.
Did you also update your old cabinet? I would love to use this idea for my small kitchen.
Wow!! I love what you have done to your kitchen and those backsplashes are just tremendous for the kitchen. I like how you have mentioned the step by step guide to install that backsplash. Thank you for sharing this. I have also found this resource Grandglass.co.nz useful and its related to what you are mentioning.
I LOVE the contrast of the white beadboard, sink and counter with the ivory cabinetry. It gives visual interest without being busy. It makes the whole room look warm, serene, and sophisticated without being stuffy. I absolutely love it. I always wonder why people don’t pair white with off-white/ivory more often. It’s so pretty.
I would have that white filthy and greasy when cooking.
Looks fantastic! What did you do along the edges of the tile? We have two exposed tile edges in our kitchen. I guess you could hide them with a piece of wood trim.
I’m doing this !!!!! Your kitchen looks amazing .
Beautiful! Great job! You mentioned that you caulked the top and bottom of the bead board. How did you finish the two sides at each end of your cabinetry? Thanks.
Hi Sarah! This is just lovely. I bought a condo with old 50’s tile in the kitchen and I am seriously considering doing this. Did the added thickness mess with the outlets at all? Did you have to do any adjusting? Or did the outlet covers fit back on as usual? Thank you for sharing!
Did you use a moisture resistant beadboard?
Oh my goodness I don’t know why I have never thought of this before! I love how this turned out so much!!! Thanks for the tutorial. I am doing some kitchen cabinet refinishing here at my house in Charleston and then I am totally going to give this a try. Thanks again for all the great info!
I love this idea!!! And it looks amazing. My question is how did you finish out the sides where the tile/bead board are exposed? In my kitchen not only are the sides open but the tile also goes up about 4” on the sides of the cabinets. Just having a raw edge would not look good. Thanks for any suggestions you might have.
I see this blog is a few years old. Glad it popped up. You did a beautiful job! How has it held up over the years? Great instructions also.
Thank you, so much
These are wonderful. Even though this is almost 6 years old, will certainly consider these ideas on my next projects.
Hi there, I love this look and am seriously considering it for our kitchen Reno. I am wondering how you trimmed in the edge pieces that didn’t end in a wall corner? Did you use a trim or border of some kind? Thanks for your time and the blog!
Hi Sarah! I know this was years ago, but I love that faucet. DO you happen to have a link to that?! Thanks friend!
Wow! What’s a difference! The bead board really modernized your kitchen! I have been trying to find an economical solution for my kitchen and I think this would be ideal! Thank you so much for tutorial and idea!
What color are the cabinets painted? Love it!
Hi! I’m interested in trying this, but is it a problem with cooking and grease and water in the kitchen?
How did you finish the left and right edges of the bead board in your kitchen? The right side seems to end at a wall, simple with calk but did you have to add any edge work where the bead board did not but up to a wall or hide under trim like at your kitchen window over the sink?
What did you do for the wall area behind the stove?
I love it. I hope I can do it.